Thursday, June 13, 2019

Bedliner – Cost, Pros, and Cons

by on June 13, 2019


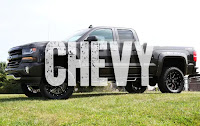
The bed of your truck is the most invaluable part of the entire truck. You can dump anything there. It is meant to be for rough use. As you use it in the best possible manner, you must take care of it in the same manner. There are many ways available in the market to protect the bed. Some of the well-known companies use thick rubber material to save the exterior from the destruction, and some provide a drop-in or spray-in bed liners.


Nowadays, there is a durable, reliable, and economical option to protect the bedliner – Here in this article, you will get the information regarding the cost, as well as the advantages and disadvantages of the bedliner. You will also get the easy step-by-step guide to applying the bedliner all by yourself!

Read further to know more!

Cost of bedliner
As per the professionals, a bed liner paint job cost range between $100 to $800 or a maximum $1000. If you want to do the paint job for the bedliner, then it starts from $80 to $100 onwards, and if you're going to go for some professional bedliner spray, it may go up t0 $800 to $1000.

Bedliner paint job is not tough. You can also do paint if you wish to. One person can complete it within a few hours. DIY bedliner  is economically best for the owner of the truck.

DIY BedLiner
Step 1: First of all, decide the right brand of paint for you and then start to your vehicle aggressively. The right angle is preferable for the spinning sander.

Step 2: Clean the surface of sanded paint with your compressor blower. Make sure you rinse it well for the better output, clean all the debris and other particles.

Step 3: Remove all the badges of the vehicle so that you can prevent painting over them.

Step 4: After removing all the badges, do some more sanding on and around the areas you want to paint.

Step 5: Now, it is the time to rag and clean the surface so that you can wash the truck quickly.

Step 6: After completing the process of sanding, stick some tapes to every part of your truck, which you don't want to paint over! There are some areas like truck locks, handles, side mirrors, badges, etc. which should not be painted. You can use newspapers too.

Step 7: Now, decide the liner color and the texture you want. Take it and open. Kindly do not forget to stir it thoroughly well. If you don't want to go out at some shops to buy such instruments, you can also use drill and blender parts to stir the color well.

Step 8: After mixing the color, now it's time to pour paint into a container. It is discretionary but preferable as pouring the paint into the bottle will help you to dip and use the roll brush quickly. You can also use wide oil brushes.

Step 9: Do the first coat. Make sure that you paint in one direction to give a genuine texture to your truck bed. After the first layer, wait for an hour and then apply the second coat. Be careful not to drip.

Step 10: At last, twenty-four hours later, remove all the tapes from the vehicle and stick all the removed badges. Your DIY bedliner has been done!

Pros and cons of the bedliner
Pros

Paint is inexpensive and budget friendly compared to others.
You can get many color options and can apply them creatively.
It is durable and strong. It also looks great.
It is easy to clean as there will be two coats on your bedliner.
Cons

As you are not professional, it might not apply well.
If you do not have a garage or any closed places, you may suffer from some bug clinging on the wet paint coat.
You have to give 24 hours to let the truck dry. So, it is quite time-consuming.
You may miss some difficult to reach areas, or sometimes you may paint on the badges, windows, or side mirrors.
So, that's all for this one! We hope you found this article informative and got all the confusions sorted. Gather as much information you can, regarding all the types of bedliners and choose the best one for your truck and usage of the bedliner.

Wednesday, June 12, 2019

Polyaspartic Flooring Overlay On Tile

by on June 12, 2019


Proper installation of this floor coding system requires the following products for equivalent safety gear, brushes rollers rollers, a manhole five-gallon bucket and measuring cups, a pair of spiked shoes, leafblower diamond grinder vacuum putty, knife, scraper and drop cloth. This product can be applied in temperatures ranging from negative 20 to 200 degrees over tonight, interior applications, as well as extra applications, any imperfections in the concrete, like tips or cracks need to be corrected prior to grinding. This can be achieved by using the recommended patch material. This material is a one to one mix, just add sand into a film. Any imperfections allow up to 20 minutes or so then down a grind smooth. Now, let's grind it's important to grind the concrete correctly, so the coating applied later will soak into the pores and block itself in, for best results use a 60 to 80 grit diamond. It is helpful to have a small hand grinder on hand to get it close towards the walls or for any patch repair work. It can be utilized in tight corners, especially along the wall. Other things to consider when, using this small hand, grinder, is to keep in a circular motion moving at all times. This avoids any deep grooves. You want to thoroughly document blow out all dust of the concrete as much as possible. It is very important that the dust is completely removed to ensure proper adhesion of the coating. It helps to blow the garage floor out two to three times. The finished profile you're looking for, is to remove about 90 % of the cream from a concrete, especially in high-traffic areas. Once all of your protective clothing has been put on make sure you have a convenient mason station set up with the drop cloth underneath it to catch any spills. Let'S get started, we are going to start out with a pigmented prime coat mix the product to spec, and it's one gallon at a time start out by cutting in and coming away from the wall three to four inches and tapering off. This makes it easier for the person growing to cover all areas give this coat anywhere from 45 to 55 minutes to dry, depending on temperature, especially before proceeding to the next step. For the next step, have a couple of 5-gallon buckets filled with color chips and put your spiced shoes on, and safety gear start cutting in. Just like the prime vote, once the first square is all cut in roll active level, then across world, even after product, even as possible, once the top two squares are all cut in and rolled out start distributing your colored chips into. It remember try to cover the floor is even as possible with the colored chips test it by pressing your thumb into it and twisting your thumb to see if the tips move. If the chips don't move you're ready for the next step blow all the loose ships to the back of the garage into one corner and pick up, you can reuse. These chips starts taping at one direction than the opposite direction apply a little bit of pressure, while straightening that they use take the floor. The better result you will have, in the end, with your texture and finish coat once the floor is all straight blow all the tips to the back of the corner of the garage and clean up once again. After all, this is done blow the garage out two to three times to make sure all the loose chips are blown out of the garage and also blow off the driveway. So no debris can blow in and later on, on your top coat put on your safety gear and spiked shoes start to mix your product. Don'T forget it mix your product to spec and one gallon at a time so off the same way that the last two coats once the square is all cut in and rolled out proceed to roll out in the opposite direction. This will eliminate any roller marks and will even out your product good job, guys you're all done three hours walk on time and 24 hours drive on time. This floor only took 8 hours at 900 square feet, you're back in business before you know it

Polyaspartic Garage Floor Coating!

by on June 12, 2019


Hey, what's going on guys, so the garage is done and really excited to show you guys this so beforehand. We just had basic concrete and on some clips right now: [, Music, ], [, Music, ], and now we got the floor coated. So we were going with either an epoxy or a polyaspartic, you know type base and we went with a polyaspartic and they said it was going to dry, easier, dry, quicker and then, on top of it it was going to. You know, look nicer. They said it's gon na be a little more durable on, so we went with it and so far, I'm beyond impressed and pleased with it. So in the future, I'm gon na make some videos about how the durability is and how it's holding up with these elements, I'm definitely next winter. You know we got some nice hunks of salt laying on it to see happen to do it. So let me give you a little view of how it looks on because I'm beyond impressed, so what we did is we went with kind of this like tan and white and black flake, for the laying the layering and the coating, and it looks really good. I mean the texture is very good and the way they just laid it down it really just goes with the whole garage Cooper is enjoying it as well, and you know you can just see, though, here in the detail of it all and how long well, it Looks they really divided up all the flakes and everything really nicely and I'm beyond I'm impressed with their work, so I'm definitely excited to see how this holds up. It'S always nice. You know having a garage that you can do all your detailing in and you know cleaning your cars in. So this is definitely a big improvement to what we had. So I'm excited to show you guys how it holds up, how it works, and I just wanted to give you a preview and my opinions on the polyaspartic process, so it took about five days to fully cure um. It was pretty smelly during those times, but you know compared to epoxy, though it's supposed to be quicker. Now it was, you know, really cold out and it kind of rained a few of those days, so the humidity might have caused. You know the drying process to lengthen a little bit but beyond impressed with the quality of work and then also on top of it, the company we had installed this. He was so adamant that polyaspartic was the best way to go. They include a lifetime warranty with this, so that's also beyond impressive that the company will stand by that because their product is so durable, so on. You know definitely subscribe to in the future to see how the florida's doing so there's my review of the garage like I said, I'm the aunt impressed with what they did and just how quickly was it, took them 12 hours to lay this all down. You know the epoxy base, sometimes that takes multiple layers and multiple steps. This also has multiple layers in it, but did it take that long, so very impressed with this so far also feel free to subscribe. I have a lot of good videos coming not only on just my cars but even future cars. I'M looking at looking to get my first exotic here in the next six to eight months, so I'm gon na need your guy's help. Amazing gestures or anything would be great, so definitely clean. Click that subscribe button and I'll see you guys later Music, ] up the whole house for two weeks straight: oh geez. This is how this is how it is. We can't have nice things at all.