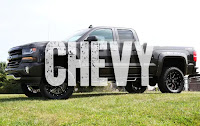
The bed of your truck is the most invaluable part of the entire truck. You can dump anything there.
It is meant to be for rough use. As you use it in the best
possible manner, you must take care
of it in the same manner. There are many ways available in the market to protect the bed.
Some of the well-known companies use thick rubber material to save the exterior from the destruction, and some provide a drop-in or spray-in bed liners.
Nowadays, there is a durable, reliable, and economical option to protect the
bedliner – Here in this article, you will get the information regarding the cost,
as well as the advantages and disadvantages of the
bedliner. You will also get the easy step-by-step guide to applying the
bedliner all by yourself!
Read further to know more!
Cost of
bedliner
As per the professionals, a bed liner paint job cost range between $100 to $800 or a maximum $1000. If you want to do the paint job for the
bedliner, then it starts from $80 to $100 onwards, and if you
're going to go for some professional
bedliner spray, it may go up t0 $800 to $1000.
Bedliner paint job is not tough. You can also
do paint if you wish to. One person can complete it within a few hours. DIY
bedliner is economically best for the owner of the truck.
DIY
BedLiner
Step 1: First
of all, decide the right brand of paint for you and then start to your vehicle aggressively. The right angle is preferable for the spinning sander.
Step 2: Clean the surface of sanded paint with your compressor blower. Make sure you rinse it well for the better output
, clean all the debris and other particles.
Step 3: Remove all the badges of the vehicle so
that you can prevent painting over them.
Step 4: After removing all the badges, do
some more sanding on and around the areas you want to paint.
Step 5: Now, it is the time to rag and clean the surface so
that you can wash the truck quickly.
Step 6: After completing
the process of sanding, stick some tapes to every part of your truck, which you don't want to paint over! There are some areas like truck locks, handles, side mirrors, badges, etc.
which should not be painted. You can use newspapers too.
Step 7: Now, decide the liner color and the texture you want. Take it and open. Kindly do not forget to stir it thoroughly well. If you don't want to go out at some shops to buy such instruments, you can also use drill and blender parts to stir the color well.
Step 8: After mixing the color, now it's time to pour paint into a container. It is discretionary but preferable as pouring the paint into the bottle will help you
to dip and use the roll brush quickly. You can also use wide oil brushes.
Step 9: Do the first coat. Make sure
that you paint in one direction to give a genuine texture to your truck bed. After the first layer, wait for an hour and then apply the second coat. Be careful not to drip.
Step 10: At last, twenty-four hours later, remove all the tapes from the vehicle and stick all the removed badges. Your DIY
bedliner has been done!
Pros and cons of the
bedliner
Pros
Paint is inexpensive and budget friendly compared to others.
You can get many color options and can apply them creatively.
It is durable and strong. It also looks great.
It is easy to
clean as there will be two coats on your
bedliner.
Cons
As you are not professional, it might not apply well.
If you do not have a garage or any closed places, you may suffer from some bug clinging on the wet paint coat.
You have to give 24 hours to let the truck dry.
So, it is
quite time-consuming.
You may miss some difficult to reach areas, or sometimes you may paint on the badges, windows, or side mirrors.
So, that's all for this one! We hope you found this article informative and got all the confusions sorted. Gather as much information you can, regarding all the
types of bedliners and choose the best one for your truck and usage of the
bedliner.


No comments:
Post a Comment